Turning a scanned document into a PDF is pretty straightforward. You use a scanner, an app on your phone, or an online tool to capture the document, then just save it as a PDF. But that's only half the story. The real magic happens when you make that PDF searchable using Optical Character Recognition (OCR), which turns a flat picture of text into a document you can actually interact with.
From Paper Piles to Searchable Files
Let's be honest, dealing with stacks of paper or folders full of flat image scans is a massive productivity killer. They're a pain to organize, impossible to search, and a hassle to share. Converting these static files into smart, searchable PDFs is a total game-changer for getting things done, both at work and at home.
Imagine turning that overflowing filing cabinet of invoices into a digital library where you can find any keyword in seconds. This isn't just about cleaning up; it's about reclaiming your time and bringing some much-needed order to your digital life. The whole process is designed to turn clutter into a streamlined, accessible archive.
This visual breaks down the simple workflow, from a physical piece of paper to a fully functional, searchable PDF.
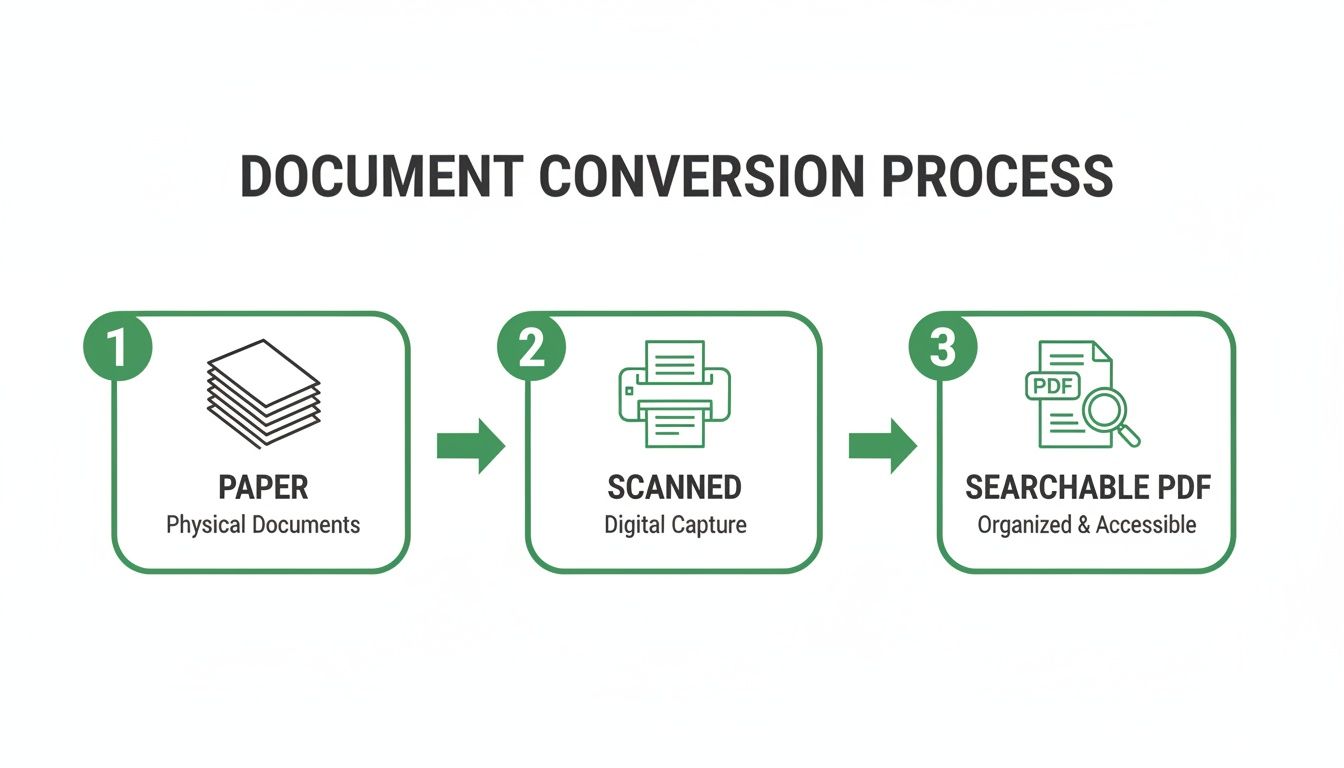
The journey from a disorganized paper mess to a fully searchable PDF only takes a few simple steps.
Why Digital Conversion Matters
The need to turn scanned documents into searchable PDFs has exploded recently. The technology that makes this possible, OCR, has seen a 45% jump in adoption since 2020. But here's the catch: even with this growth, a surprising 33% of scanned PDFs are still unsearchable. That's a huge gap in a lot of people's workflows, and it's exactly what simple online tools are built to fix. You can dig into more PDF usage trends to get the full picture.
Here’s a quick look at why converting a static scanned image (like a JPG) into a fully functional, searchable PDF makes all the difference.
Document Format Comparison: Scanned Image vs. Searchable PDF
| Feature | Scanned Image (JPG/PNG) | Searchable PDF |
|---|---|---|
| Searchability | No. Just a flat picture. | Yes. Find any word instantly. |
| Copy & Paste Text | No. Text is part of the image. | Yes. Select and copy text easily. |
| Accessibility | Poor. Not readable by screen readers. | Good. Accessible to screen readers. |
| File Size | Often large, especially high-res. | Can be highly compressed. |
| Sharing | Can be clumsy with multiple files. | Easy. Combines all pages in one file. |
Ultimately, a searchable PDF isn’t just a digital copy; it’s an intelligent, interactive document that works for you.
Think about this real-world scenario: a small business owner was drowning in receipts during tax season. Every single deduction meant digging through boxes of faded paper by hand. It was a nightmare.
By switching to a simple scan-to-PDF workflow, they completely transformed their chaotic accounting process. They could instantly search for vendor names, dates, or specific items, which saved them countless hours and a ton of stress.
This shift from physical to digital isn't just about storage—it's about creating a smarter, more efficient system. The true power here is the ability to instantly find information that was once locked away in your documents. You're moving beyond simple digital copies and creating a dynamic, useful resource that ensures your important information is always just a few clicks away.
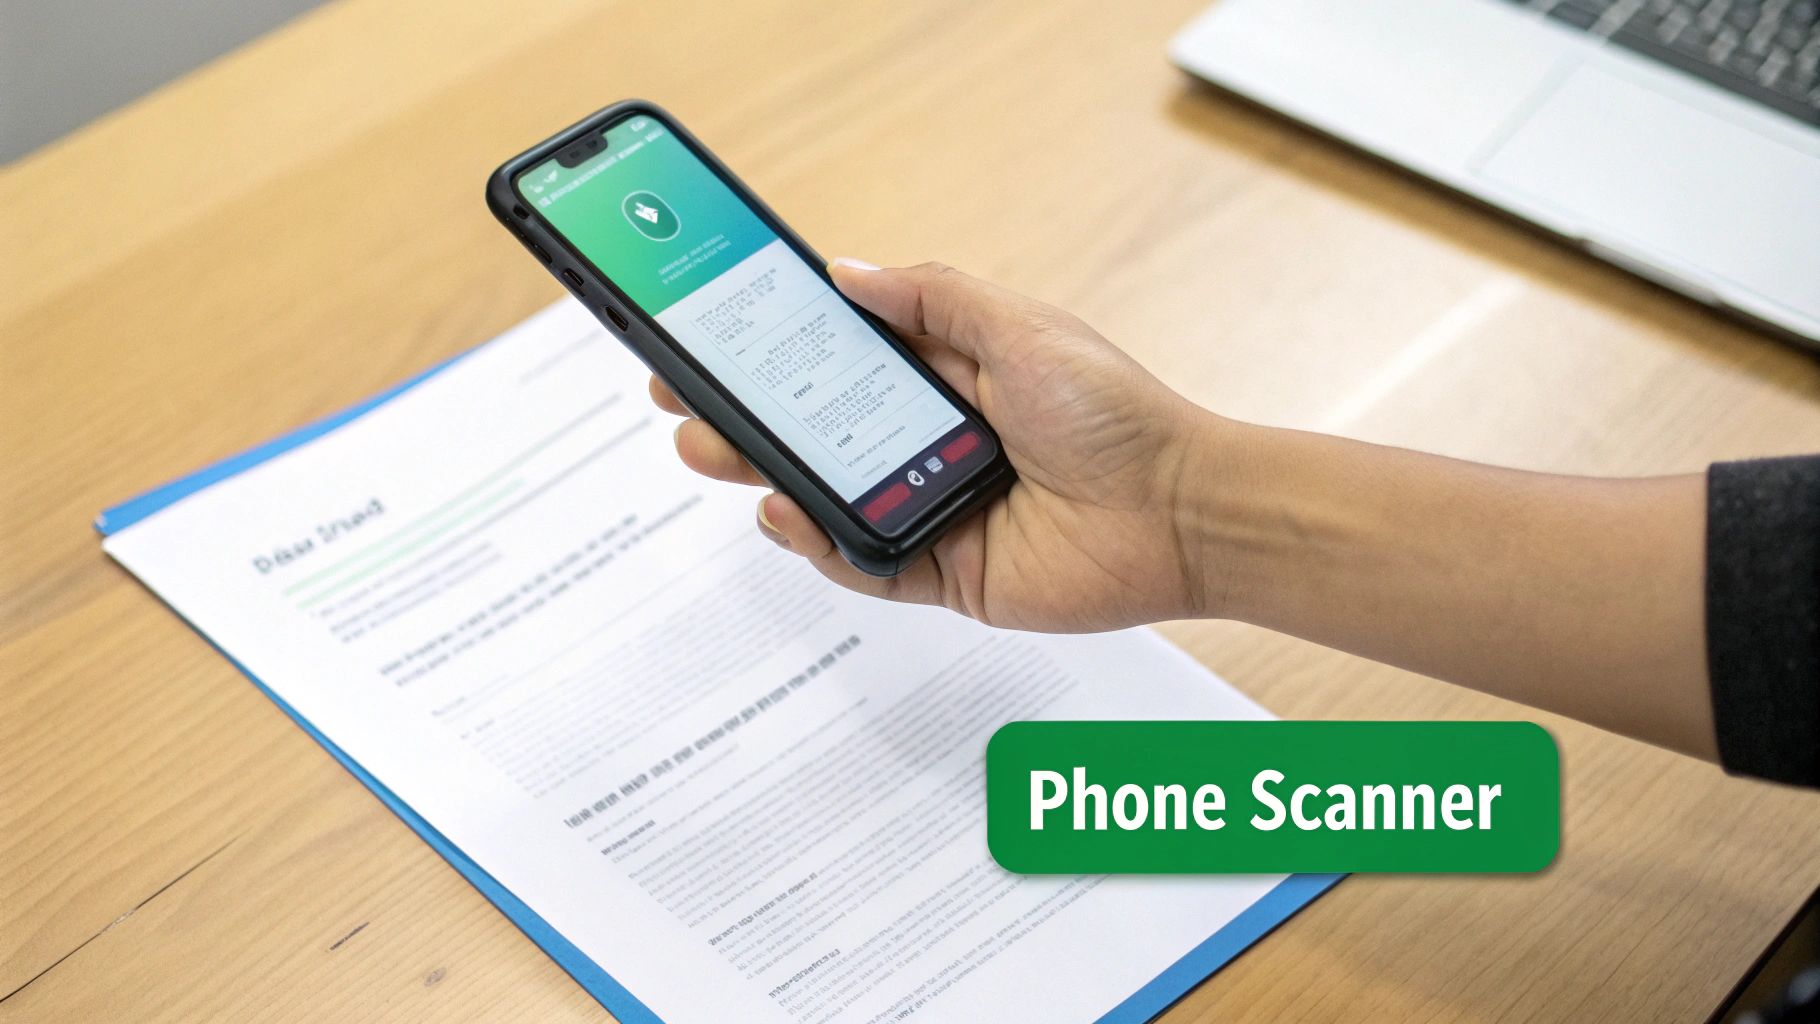
Using Your Phone as a High-Quality Scanner
Forget the bulky flatbed scanner gathering dust in the corner. The best scanner you own is probably already in your pocket. Your smartphone’s camera, paired with some clever software, can produce crisp, clean scans that are perfect for turning into professional-quality PDFs.
This is a game-changer for handling paperwork on the go. You no longer have to wait until you’re back at your desk to scan a signed contract or a handful of receipts. Now you can capture, convert, and share documents in minutes, wherever you are.
Built-In Scanning Tools on iOS and Android
The best part? You don’t even need a special app to get started. Both iPhones and Androids have powerful scanning features baked right into the operating system.
-
For iPhone Users: The Notes app is your secret weapon. Just open a new note, tap the camera icon, and choose "Scan Documents." The app automatically finds the edges of the paper, straightens the image, and saves it right in your note, ready to share as a PDF.
-
For Android Users: The Google Drive app does the same thing. Tap the big "+" button, select "Scan," and your camera opens up. It helps you line up the shot, cleans up the image, and saves it directly to your Drive as a PDF.
These built-in tools are perfect for quick, simple jobs when you just need to digitize a page or two without any fuss.
Dedicated Apps for More Power
When you need more control, dedicated scanning apps are the way to go. Powerhouses like Adobe Scan and Microsoft Lens give you a suite of features that turn your phone into a serious document-capturing machine.
These apps offer better edge detection, perspective correction, and even color filters that make your documents look like they came from a high-end office scanner. They’re fantastic for multi-page documents, letting you scan an entire report and compile it into a single, organized file.
If you already have photos of documents on your phone, you don't need to re-scan them. You can easily convert your images to PDF using a simple browser-based tool.
Tips for a Perfect Mobile Scan
No matter what app you use, getting a great scan comes down to a few simple tricks of the trade.
- Find Good Lighting: Bright, indirect light is your best friend. Natural light from a window is ideal, as it helps avoid weird shadows on the page.
- Use a Contrasting Background: Place your white document on a dark table or desk. This contrast helps the app’s automatic edge detection lock on perfectly.
- Hold Steady: Keep your phone as parallel to the document as possible and hold it still to prevent blur. Most apps have an auto-capture feature that waits for a stable shot before snapping the picture for you.
Combining Multiple Scans into a Single PDF
So, you've scanned all your documents, but now they’re just a messy pile of individual JPGs, PNGs, and HEIC files cluttering up your desktop. A separate file for every single page of a contract? Or for each receipt in an expense report? That's not just messy—it's inefficient.
The next step is to bring all those scattered pieces together into one clean, professional PDF.
And no, you don't need to download any clunky software for this. Simple, browser-based tools are perfect for turning a chaotic folder of images into a single, organized document. It’s a trick that more and more people are catching on to. In fact, the use of cloud-based PDF tools has skyrocketed, growing by 200% since 2020. This massive shift is driven by small businesses and educators who need quick solutions without the hassle of installing software.
Gathering and Uploading Your Scanned Images
First things first, get all your individual image files into one place. Let's say you're putting together an expense report with five receipts. Right now, they're five separate JPG files.
Instead of annoying your manager with five separate attachments, your goal is to merge them into a single, multi-page PDF. With a tool like PDFPenguin's JPG to PDF converter, you just drag and drop all five images into your browser at once.
The whole interface is built to be dead simple.
You'll see a clean, drag-and-drop area where you can add all your scanned image files to get them ready for conversion.
Once your images are uploaded, the tool shows you thumbnails of each one. Think of this as your digital workspace where you can see all your pages laid out and get them in order.
Arranging and Merging Your Pages
With everything uploaded, you now have full control. This is where you make sure your final document makes sense. Sticking with the expense report example, you’ll probably want to arrange the receipts chronologically.
It's as easy as dragging and dropping. Just click on a receipt's thumbnail and move it to where it needs to go in the sequence.
Pro Tip: Before you hit merge, do a quick visual check on the orientation. Most online tools let you rotate individual pages on the fly. This way, you avoid having that one rogue receipt appear sideways in the final document.
Once you're happy with the order and orientation, you're just a click away from being done.
- Review Your Page Order: Drag the thumbnails around until they're in the right sequence.
- Check the Orientation: Give any sideways pages a quick rotate so they’re upright.
- Click to Merge: Hit the "Convert" or "Merge" button, and the tool does the rest.
The tool will process everything and give you a download link for your brand-new, multi-page PDF. The whole thing—from a folder of messy scans to a polished document—usually takes less than a minute. And if you're working with existing PDFs, our guide on how to combine PDF files for free has even more tips.
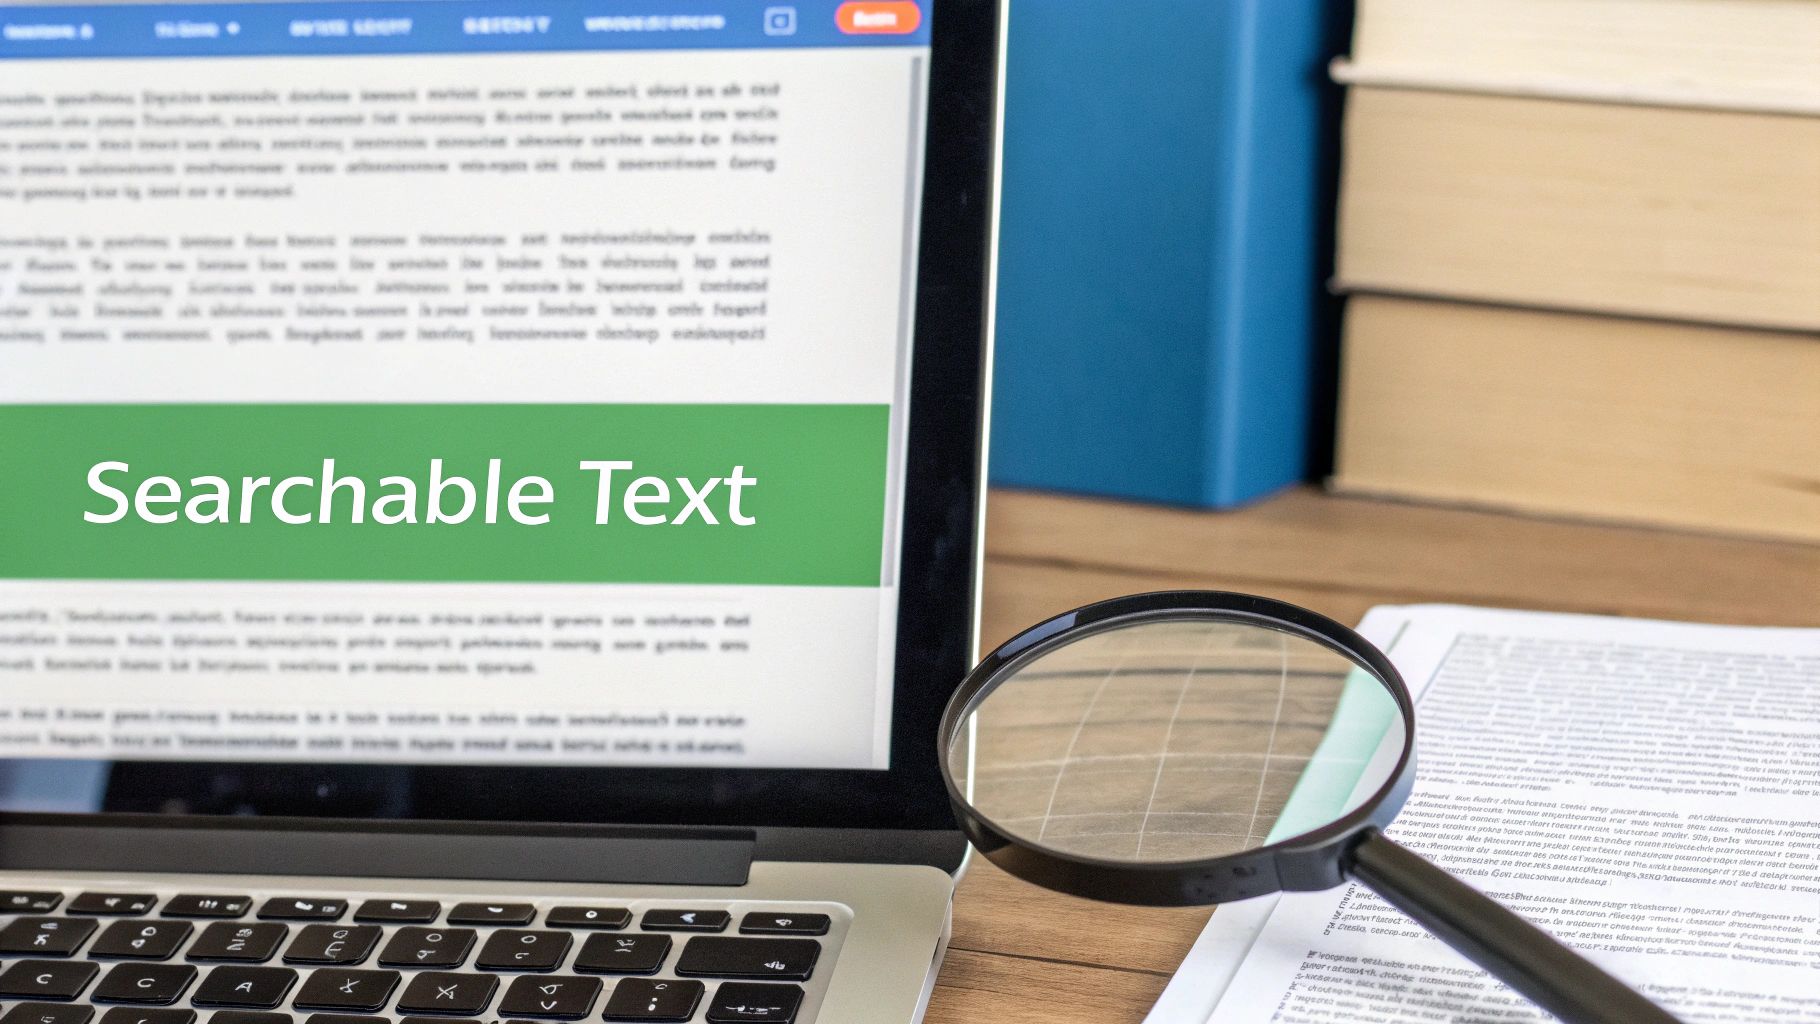
Making Your Scanned PDFs Searchable with OCR
You’ve scanned a document, and now it’s a PDF. Great first step, but there’s a catch: right now, it’s just a picture of words. Your computer sees an image, not actual text. This means you can't search for a key phrase, copy a sentence, or use a screen reader. It's digital, but it isn't very smart yet.
This is where a technology called Optical Character Recognition (OCR) completely changes the game. It’s the final, crucial step that transforms your static scan into a genuinely useful, interactive file.
How OCR Transforms Your Scans
So, what’s happening behind the scenes? OCR software scans the image of your document, intelligently identifies the shapes of letters and numbers, and then creates an invisible text layer right on top of the original scan. You still see the same document, but now your computer can read it, too.
The impact is huge. That 200-page report you scanned? Now you can hit Ctrl+F (or Cmd+F) and find a specific name in seconds. That brilliant quote from a textbook? Just copy and paste it directly into your notes.
The demand for this is massive. Some platforms process over 100 million PDFs a week, and file conversions—including OCR—make up a whopping 28% of that activity. This just goes to show how many people need to make their documents not just digital, but intelligent. You can dig into more PDF statistics and usage data to see how common this is.
Applying OCR with Online Tools
You don't need to buy or install complicated software for this. Modern browser-based tools have made applying OCR incredibly simple. It’s literally as easy as uploading a file and clicking a button.
Most online OCR tools follow the same simple steps:
- Upload Your PDF: Drag and drop your scanned PDF onto the page.
- Let the Magic Happen: The tool analyzes the document, recognizes the text, and builds that hidden, searchable layer.
- Download Your New File: In moments, you get a new, intelligent version of your PDF.
The real win here is the time you save later. Instead of rereading an entire document to find one piece of information, you can pinpoint it instantly. This turns static archives into dynamic, searchable resources.
Why a Searchable PDF Is So Much Better
Making your scanned documents searchable is more than just a minor convenience—it's a fundamental upgrade that unlocks the true potential of your digital files.
Here’s why you should always run your scans through an OCR process:
- Find Information Instantly: Searching for keywords is worlds faster than skimming by eye.
- Copy and Paste Content: Grab text from the PDF to use elsewhere without having to retype everything.
- Improve Accessibility: Screen readers can now interpret the document, making it accessible to users with visual impairments.
- Keep File Sizes Small: The text layer adds almost nothing to the overall file size, so you get all the benefits without the bloat.
By taking that one extra minute to apply OCR, you're not just archiving a document—you're creating a usable, valuable asset. It's the final, essential step in learning how to convert scanned documents to PDF the right way.
You’ve done the hard part—your paper document is now a clean, searchable PDF. But before you hit send, there are a couple of finishing touches that separate a good scan from a great one. These last steps are all about making your document professional, portable, and secure.
Scanned files, especially high-quality ones, can be surprisingly large. Ever tried emailing a bulky PDF only to have it bounce back? That's where compression comes in. A good online tool can shrink your file size dramatically without making it look blurry or hard to read, which is perfect for email attachments or web uploads.
Shrinking Your PDF for Easy Sharing
This is incredibly easy to do. Just upload your PDF to a compression tool, pick a quality level (the "recommended" or "balanced" setting is usually best), and let it work its magic. I’ve seen 10MB documents shrink down to 1MB in seconds, making them a breeze to share.
This is also the perfect time to combine different scans. Maybe you scanned a cover letter and a resume separately. Instead of sending two files, you can merge them into a single, polished PDF. It just looks cleaner and more professional.
Adding a Layer of Security
This might be the most important final step, especially if your document contains sensitive info like financial records, contracts, or personal data. Adding a password is a simple but effective way to control who gets to open your file.
Your documents are more than just information; they're assets that deserve protection. Taking a moment to add a password or restrict permissions turns a simple file into a secure digital container, giving you peace of mind when sharing sensitive data.
You can go beyond just a simple password, too. Set specific permissions to stop people from printing, copying text, or editing your document. This gives you fine-grained control over how your information is used long after you've sent it. For the exact steps, check out our guide on how to make a PDF password protected.
This focus on security is a huge reason people go to the trouble of converting scans to PDF in the first place. In fact, 43% of externally shared PDFs are now encrypted with strong standards like AES-256 to meet privacy rules like GDPR and HIPAA. It’s a professional standard that’s surprisingly easy to apply once your scan is converted. Getting these final steps right is what truly completes the process of turning a simple scan into a secure, shareable, and professional document.
Your Top Questions About Converting Scans to PDF
Even when the tools are simple, a few questions always pop up when you're turning paper into pixels. I get it. Here are some quick, no-nonsense answers to the most common issues people face.
Will Turning a Scan Into a PDF Make It Look Worse?
Nope, not usually. If you start with a good, clean scan—something around 300 DPI (dots per inch) is the sweet spot—it will look just as crisp inside the PDF. The PDF is just the container; it's the quality of the scan itself that really counts.
What can affect quality is compression. If you shrink the file to make it small enough to email, you might lose a little sharpness. The good news is that most tools let you pick a compression level, so you can find that perfect balance between a small file size and a clear, readable document.
What’s the Big Deal About a "Searchable" PDF?
A standard scanned PDF is basically just a picture of a document. You can look at it, but your computer has no idea what the words on the page actually say. It’s a flat image, and you can't copy text or search for a specific phrase.
A searchable PDF is the smart version. It’s been run through an OCR (Optical Character Recognition) process that adds an invisible layer of text on top of the image. This is a game-changer. It means you can hit Ctrl+F (or Cmd+F) to find keywords, copy-paste paragraphs, and even use screen readers.
Can I Make a Handwritten Note Searchable?
You can, but your mileage may vary. Modern OCR is surprisingly clever and can often read neat, block-printed handwriting without a problem. Cursive or messy scrawls? That's where it starts to struggle.
To give the OCR the best possible shot, here’s what I recommend:
- Make sure your scan is super clear and evenly lit. No weird shadows.
- Scan against a dark background if you can. It helps the software find the edges of the paper.
- Good contrast is key. Dark ink on light paper works best.
Do I Really Need to Install Software for This?
Not anymore, thankfully. While there’s still heavy-duty desktop software out there, you can do almost everything right in your web browser. Just use your phone's camera to scan the document, then upload it to an online tool to convert it, make it searchable, or merge it with other files. It keeps things simple and means you can get the job done from any computer, anywhere.
Ready to turn that stack of paper into clean, organized PDFs? The tools from PDFPenguin are built for this. You can merge, compress, and secure your documents in seconds, all from your browser. Give it a try for free at PDFPenguin.