Shrinking a file is simple enough on the surface—you can compress images, tweak PDF quality settings, or switch to a more efficient format.Most of the time, a good browser-based tool will even give you presets for email, web, and print that find the right balance for you. A few clicks, and you're done.
Why File Size Still Matters in a High-Speed World
 It’s easy to think file size is a solved problem. We have blazing-fast internet and cloud storage is cheap, so who cares about a few extra megabytes, right?
But in reality, large files are still a constant source of friction in our digital lives. They create little delays and frustrations that add up.
Think about the last time you tried to email a big presentation. Chances are, you hit that dreaded 25 MB attachment limit and had to scramble for a workaround. Or what about that website with gorgeous, high-res images that took forever to load on your phone? These aren't just minor annoyances; they slow us down and get in the way.
The Everyday Headaches of Large Files
The ripple effect of bloated files goes beyond slow downloads. From students trying to submit assignments to professionals collaborating on projects, oversized files create a cascade of problems. Once you start noticing them, you see them everywhere.
A few common pain points include:
- Slow Cloud Syncing: Huge files can take forever to sync across Google Drive or Dropbox, leaving you waiting for the one document you need right now.
- Website Performance: Unoptimized images and PDFs are notorious for slowing down page load times. This doesn't just annoy visitors—it can also hurt your search engine rankings. A good website optimisation service often starts by tackling file sizes.
- Storage Costs: Sure, storage is cheaper than ever. But hoarding unnecessarily massive files eventually adds up, leading to real costs for both businesses and individuals over time.
The real challenge isn’t just making files smaller. It’s about striking that perfect balance between size and quality. A super-compressed image is useless if it’s a blurry mess.
Thankfully, you no longer need to be a tech wizard with complicated desktop software to get this right. Modern browser-based tools make it incredibly simple. They turn what used to be a technical chore into an easy task for anyone. Throughout this guide, we’ll dive into practical ways to shrink your files without sacrificing the quality you actually need.
Mastering PDF Compression for Professional Documents
PDFs are the workhorse of the modern office. We use them for everything from contracts and portfolios to reports and invoices. But that reliability can come with a major downside: bloated file sizes, especially when you've got high-resolution images or complex graphics in the mix.
A massive PDF isn't just a small annoyance. It can jam up email inboxes, get rejected by upload portals, and create a frustrating experience for anyone trying to download it on a slow connection.
Knowing how to shrink a PDF is an essential skill. The goal is to hit that sweet spot where the file is small enough to share effortlessly but still looks crisp and professional. Thankfully, you don't need to be a graphic designer to get it right.
Choosing the Right Compression Level
Not all compression is the same. You wouldn't use the same settings for a high-end design portfolio as you would for a simple text document you're emailing to a colleague. The key is to match the compression level to what you need the document for.
Most online tools make this easy by offering presets. These presets automatically tweak the technical stuff—like image resolution (DPI) and color depth—to find the right balance for you.
Here’s a quick look at the options you'll usually see:
- Basic Compression (Large File Size): This is the lightest touch. It’s perfect for documents destined for print, where every detail in your photos and graphics needs to be razor-sharp.
- Recommended Compression (Medium File Size): This is your go-to for most things. It strikes an excellent balance, dramatically cutting down the file size with virtually no noticeable drop in quality for on-screen viewing. Think reports, presentations, and web uploads.
- Strong Compression (Smallest File Size): This is the one you pick when file size is the only thing that matters. It's great for getting a huge file under a strict upload limit or sending it over a weak internet connection. Text will stay readable, but images will definitely look less sharp.
To make this choice even clearer, here’s a simple table to guide you.
Choosing the Right PDF Compression Level
This table helps you pick the perfect setting by weighing file size against visual quality.
| Compression Level | Best For | Typical Size Reduction | Quality Impact |
|---|---|---|---|
| Basic | Print documents, high-res portfolios | 10-25% | Minimal. Images and text remain sharp. |
| Recommended | Email, web uploads, general sharing | 40-60% | Negligible for on-screen viewing. |
| Strong | Meeting strict upload limits, emailing large files | 70-90% | Noticeable reduction in image quality; text remains clear. |
Ultimately, "Recommended" is usually the best bet for everyday use, giving you the best of both worlds.
The demand for easy PDF solutions is absolutely massive. Some platforms process over 100 million PDFs a week. Of all the tasks people perform, compression is the most common, accounting for 34% of all tool usage. That staggering volume shows just how critical this is for professionals everywhere. You can read more about these trends in PDF usage.
Using a Browser-Based PDF Compressor
For most of us, a simple, free online tool is the fastest way to get this done. There's no software to install, and the whole process usually takes less than a minute.
Most tools have a straightforward interface. You just upload your file and pick one of the compression presets we talked about. For example, here's what a typical online compressor looks like.
As you can see, the options are clearly laid out. You can decide whether high quality or the smallest possible size is your top priority.
Once you've made your choice, the tool does the heavy lifting and gives you a download link. For a more detailed guide, check out our walkthrough on how to compress a PDF with an online tool.
Pro Tip: Always download and do a quick quality check on your compressed file before sending it off, especially if it contains important text or data visualizations. Modern tools are great, but a quick once-over ensures your document looks as professional as you intended.
Smart Strategies for Image File Size Reduction
Images are almost always the biggest culprits behind bloated files. Whether it's a webpage that loads at a snail's pace, a report your email provider refuses to send, or a sluggish PowerPoint, oversized images are usually to blame.
The trick isn't just to shrink them—it's to do it smartly, so your crisp photos don't end up looking like a pixelated mess. The whole game comes down to balancing three things: file format, compression type, and image dimensions. Get that mix right, and you’ll slash your file sizes while keeping your visuals sharp. If you build websites, this isn't just a nice-to-have; it's essential. You can learn how to optimize images for web performance to see just how much of an impact this can make.
File Formats and Compression Types
Your first move is picking the right tool for the job. Not all image formats are built the same, and choosing the correct one is half the battle.
- JPG (or JPEG): This is your best friend for photographs. JPGs use lossy compression, a clever technique that throws away tiny bits of data your eyes probably wouldn't notice anyway. The result? A massive reduction in file size.
- PNG: Perfect for logos, icons, or graphics with sharp lines and transparent backgrounds. PNGs use lossless compression, which means every single pixel is preserved. This gives you pristine quality but comes at the cost of a much larger file. If size is more important than transparency, you can always convert from PNG to JPG.
- WEBP: The new kid on the block, developed by Google. It offers the best of both worlds, with superior lossy and lossless compression. A WEBP file is often much smaller than a JPG or PNG of the same quality, making it a fantastic choice for the web.
The word "lossy" can sound a little scary, but trust me, it’s what you want for most photos. A JPG saved at 80% quality often looks identical to the original but can be a fraction of the size. It's all about finding that sweet spot right before you can actually see the quality dip.
Resizing and Quality Settings
Once you've picked a format, you have two more dials you can turn: image dimensions and quality.
A photo straight from your phone can easily be 4000 pixels wide—that's huge! For a blog post or a document, you probably don't need anything wider than 800 pixels. Simply resizing an image to the dimensions it will actually be displayed at is one of the easiest and most effective ways to cut down its size.
The same goes for compression quality. You'd be amazed at the file size savings you can get by dropping the quality from 100% to 90%. In most cases, you won't see any difference at all.
This quick flowchart can help you decide how aggressive to be with your compression.
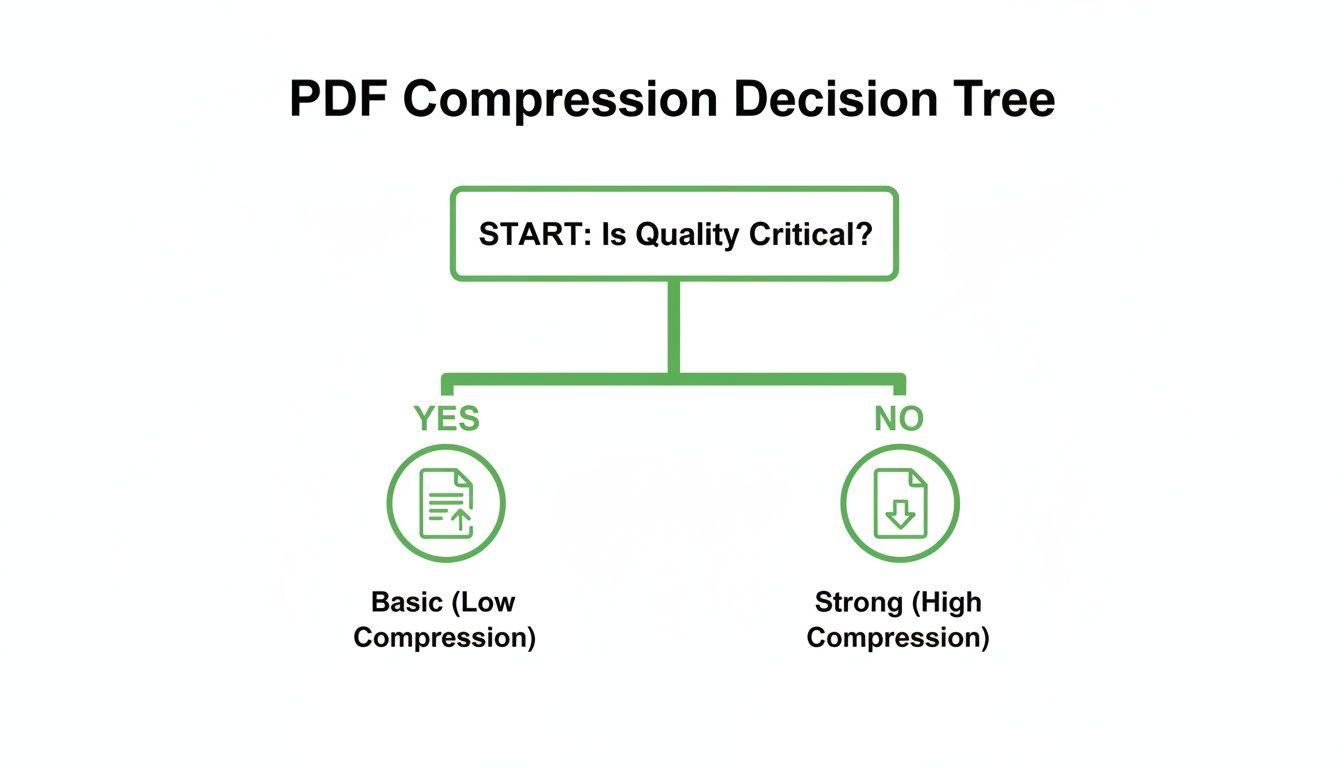
As you can see, unless you absolutely need gallery-level quality, a stronger compression is usually the way to go. This same principle is what makes PDF compression so effective. In reports and brochures, images can account for 80-90% of the file size, which is why shrinking a PDF is almost entirely about optimizing the images inside it.
Optimizing Your Word and PowerPoint Files
Ever tried to email a 50 MB PowerPoint presentation, only to get that dreaded "file too large" bounce-back? Or maybe you've had a sprawling Word report get rejected from an online portal. It happens all the time. Microsoft Office documents are notorious for getting bloated with high-res images, embedded fonts, and other hidden data.
But here’s the good news: you don't need fancy third-party tools to fix it. Both Word and PowerPoint have powerful, often-overlooked features that let you shrink your files right inside the app. Before you go searching for an online compressor, these built-in options should be your first stop.
Tame Your Images with Compress Pictures
Nine times out of ten, the biggest culprit behind a massive file is the images. Every time you drag and drop a photo into your document, Office keeps it at its original, full-resolution glory. That's great for print quality but a disaster for file size.
The "Compress Pictures" tool is your secret weapon here.
Just click on any image in your document, and a "Picture Format" tab will pop up. From there, find the Compress Pictures option. This little dialog box is where the magic happens.
- Uncheck "Apply only to this picture": This is the most important step. It tells Office to compress every single image in your document at once.
- Check "Delete cropped areas of pictures": When you crop an image, Office just hides the cropped parts—it doesn't actually delete them. This option permanently removes that extra data.
- Choose a Resolution: You'll see a few options. "Web (150 ppi)" is usually the sweet spot for presentations and on-screen documents. If you need the absolute smallest size for an email attachment, "E-mail (96 ppi)" will do the trick, though you might notice a slight drop in quality.
I've seen a presentation with a dozen high-res photos go from 50 MB down to a super-shareable 5 MB just by using the "Web" compression setting. It's a game-changer.
Smart Strategies for PowerPoint Presentations
PowerPoint files have their own special ways of ballooning in size, especially when you start adding videos. The single biggest mistake I see is embedding a large video file directly into a slide.
Instead, link to the video file. This keeps the video separate from your presentation, making your .pptx file incredibly small and quick to load.
Another simple fix is to always save your work in the modern .pptx format, not the old .ppt. The modern format is basically a compressed (zipped) folder of all your slides and media, which makes it far more efficient. And if you're sending a final, non-editable version, learning how to turn a PowerPoint into a PDF is a fantastic move. It locks down your formatting and almost always results in a smaller file.
Word Document Bloat and How to Fix It
With Word documents, the two sneak thieves of space are embedded fonts and copy-pasted images.
When you choose to embed fonts, you're literally stuffing the entire font file into your document so it looks perfect on any computer. It's a useful feature for very specific design cases, but it adds a ton of weight. Unless you have a very good reason, make sure that option is turned off in your "Save" settings.
Also, try to get in the habit of using the "Insert > Pictures" command instead of just pasting images from your clipboard. Pasting can sometimes bring in extra, unoptimized data. Using the "Insert" function keeps things cleaner and works much better with the "Compress Pictures" tool we just talked about, helping you create a lean, easy-to-share document every time.
How to Compress Video and Audio Files
If there's one thing guaranteed to clog up an email or eat through your cloud storage, it's video and audio. A single, short 4K video clip can easily dwarf a folder of a hundred documents combined. They're the undisputed heavyweights of the digital world, making them a real headache to share, upload, or store.
Compressing them is non-negotiable, but it often feels like a dark art, full of intimidating technical jargon. The good news? You only need to get a handle on three key concepts to take back control. Understanding these settings will let you slash file sizes without making your media look and sound terrible.
The Big Three of Media Compression
Think of these as the main dials you can turn to shrink your files. Adjusting one almost always affects the others, so the goal is to find that sweet spot—a perfect balance for what you actually need.
- Codec (Compression/Decompression): This is the engine doing the heavy lifting. Modern codecs like H.265 (HEVC) are way more efficient than older ones like H.264, giving you the same quality in a much smaller package. For audio, AAC is a fantastic, widely supported choice.
- Resolution: These are the video’s dimensions in pixels (like 1920x1080, better known as 1080p). Knocking a 4K video down to 1080p will give you a massive size reduction. Honestly, unless your audience is watching on a giant TV, they probably won't even notice the difference.
- Bitrate: This is all about data density—how much data is used to encode one second of your media, usually measured in kilobits or megabits per second (kbps/Mbps). A lower bitrate means a smaller file, but if you push it too far, you'll start seeing ugly compression artifacts.
The core idea of removing data to save space isn't new. In fact, one of the most effective ways to shrink PDFs has always been by stripping out junk data, which can reduce file sizes by 50-70%. You can learn more about how removing hidden data shrinks PDFs on TechdayHQ. The same principle applies here—we’re just tossing out video and audio data our eyes and ears won’t miss.
A Practical Game Plan for Smaller Media
For most people, a free tool like HandBrake (for your desktop) or a decent online video compressor is all you'll ever need. These tools are great because they offer presets that do the complex decision-making for you.
When you're ready to shrink a video, here’s a simple workflow that just works:
- Load Your File: First, open your video in the compression software.
- Pick a Preset: Look for options like "Fast 1080p30" or "Web Optimized." These presets are your best friend—they'll handle the tricky settings for you.
- Check the Codec: Make sure a modern codec like H.265 or VP9 is selected. This is where you get the most bang for your buck in terms of efficiency.
- Tweak the Bitrate (If You Must): If the presets still give you a file that's too big, you can manually lower the bitrate. Just be careful and do it in small steps to avoid trashing the quality.
What about audio? For things like podcast episodes or voice recordings, the fix is usually much simpler. Just converting a bulky WAV file to a high-quality MP3 or AAC is often enough to make it perfectly shareable without any noticeable loss in clarity.
Your Top Questions About File Compression, Answered
Jumping into file compression can bring up a lot of questions. Once you start shrinking files regularly, you'll bump into different terms and tricky scenarios. Think of this section as your quick-reference guide to the most common queries, helping you compress with total confidence.
Does Shrinking a File Automatically Ruin its Quality?
Not at all. The real question is whether you're using lossless or lossy compression.
Lossless compression is like a perfect vacuum seal for your data. When you create a ZIP file, it reorganizes everything to take up less space without tossing out a single bit of information. Unzip it, and every pixel and character is restored exactly as it was. This is non-negotiable for things like text documents, code, or software where 100% integrity is a must.
Lossy compression is the smart, selective approach used for media like JPEGs, videos, and MP3s. It works by intelligently removing data our eyes and ears probably won't miss anyway. A little bit of lossy compression can slash file sizes with zero noticeable drop in quality. You only run into trouble when you get too aggressive with the settings.
The word "lossy" sounds a bit scary, but it’s the magic behind a fast-loading internet. A photo saved at 90% JPEG quality often looks identical to the original but can be 50% smaller. It’s all about finding that sweet spot.
What’s the Best Image Format for the Smallest File Size?
There's no single "best" format—it really depends on what's in the image and where you plan to use it. But for most jobs, there are clear winners.
- For photographs: A well-optimized JPG is still the king. Its compression is specifically designed for the complex gradients and millions of colors you find in photos.
- For simple graphics: PNG is your go-to for logos, icons, and illustrations with flat colors, sharp lines, or a transparent background. Its lossless compression keeps graphics perfectly crisp.
- For the web: In nearly every modern case, WEBP is the undisputed champion. It delivers fantastic quality for both photos and graphics at a much smaller file size than JPG or PNG, making it the top pick for website performance.
Are Online Compression Tools Actually Safe to Use?
The reputable ones are very safe, but it always pays to be smart about your data. Stick with services that use HTTPS encryption to protect your files while they’re being uploaded and downloaded—just look for the little lock icon in your browser's address bar.
A trustworthy provider will also have a clear privacy policy that states they automatically and permanently delete your files after a short time, usually a few hours. While you probably shouldn’t upload your top-secret business plans to a public tool, trusted services are perfectly secure for everyday reports, images, and presentations.
At PDFPenguin, we make document management simple and secure. Whether you need to compress a large report for email, merge several files into one, or convert images to PDFs, our browser-based tools get the job done in seconds—no software required. Experience a faster workflow today at https://www.pdfpenguin.net.