You can learn how to compress a PDF with a few clicks, either online or with desktop software. The whole point is to shrink the file by optimizing images and stripping out junk data. It’s a game-changer for getting massive documents small enough to email or upload, often cutting file sizes by 50-90% without hurting readability.
Why Bother Compressing a PDF?
Before we jump into the how, let's talk about the why. We've all been there. Large, clunky PDFs are a universal source of frustration. They jam up inboxes, make websites load at a snail's pace, and devour your cloud storage. If you’ve ever tried to email a design portfolio only to get that dreaded "undeliverable" bounce-back, you know exactly what I’m talking about.

So what makes a PDF so bloated? It's usually high-resolution images or dozens of embedded fonts that haven't been optimized. A graphic designer sending a proof, or a financial analyst archiving years of scanned records—these are classic examples of workflows that generate files far too big for their own good. The payoff for optimizing them is immediate.
The Real-World Impact of File Size
Smaller PDFs aren’t just a nice-to-have; they directly affect how efficiently you can work. Think about these everyday situations where a smaller file is a must:
- Emailing Attachments: Most email providers cap attachments at around 25MB. A compressed PDF slides right under that limit, no problem.
- Website Performance: Huge documents on your website will kill your page load times, annoy visitors, and even hurt your SEO rankings.
- Storage and Archiving: Smaller files save you money on cloud services like Google Drive or Dropbox and keep your digital archives from becoming a chaotic mess.
This isn't a niche problem. The global market for PDF Compression Software was valued at $1.2 billion and is expected to hit $3.4 billion by 2033, all because businesses are drowning in massive digital files. You can see more data on this trend over at marketintelo.com. That kind of growth tells you one thing: everyone needs smaller, more manageable documents.
Key Takeaway: Compressing a PDF isn’t just a tech trick—it’s a basic requirement for smooth digital communication. It ensures your documents get where they need to go, whether you're sending a final project to a client or collaborating with your team. Once you get the 'why,' the 'how' becomes second nature.
Compressing PDFs with Online Tools
When you need to shrink a PDF fast without installing new software, an online tool is your best bet. They work right in your browser, so it doesn't matter if you're on a Mac, PC, or even a tablet. You just upload your file, pick a setting, and get a smaller version back in minutes.
The real trick isn't finding a tool—it's understanding the options they give you. Most online compressors offer presets that juggle file size and visual quality. Getting that balance right is the key to a good result.
Navigating Compression Levels
Think of compression as a trade-off: you can have a tiny file or perfect quality, but it's tough to get both. Online tools make this simple by offering presets with straightforward labels.
- High Compression (or Basic): This is the one you pick for the smallest possible file size. It’s aggressive, often slashing file size by 70% or more, but it definitely softens image clarity. It’s perfect for drafts, web previews, or when the file is mostly text and just has to get through an email filter.
- Standard Compression (or Recommended): This is the sweet spot for most situations. It gives you a great balance, cutting the file size way down while keeping text sharp and images clear enough for any screen. This is your go-to for emailing reports, portfolios, or assignments.
Imagine a freelance designer trying to email a 25MB portfolio to a new client. A file that big is a surefire way to get blocked by an email server and look unprofessional. By using a standard compression setting, they can shrink it to a breezy 5MB file that lands in the client's inbox instantly, without losing that professional polish.
This exact problem is why PDF compression is the single most popular feature in online document tools. In fact, it accounts for 34% of all operations on major platforms that handle over 100 million PDFs every week. It just goes to show how often people run into the same size limits you're trying to solve. You can see more PDF usage stats and trends on smallpdf.com.
Choosing Your Online Compression Level
To make the choice even clearer, here’s a quick breakdown of what to expect from typical online presets.
| Compression Level | Typical Size Reduction | Best For | Potential Downside |
|---|---|---|---|
| High | 60-80% | Emailing text-heavy documents, internal drafts | Noticeable loss in image quality; may look blurry |
| Standard | 40-60% | Reports, portfolios, presentations, web uploads | Minor image softening, usually unnoticeable |
| Low/Print | 10-30% | High-quality print jobs, professional photography | Minimal size reduction; may still be too large |
Ultimately, "Standard" or "Recommended" is almost always the right call unless you have a very specific need for either maximum quality or minimum size.
A Practical Walkthrough with PDFPenguin
Let's walk through the process with a tool like ours. The whole point is to make it as painless as possible.
First, you’ll head over to the tool's webpage. The interface is always designed to be dead simple, usually with a big, obvious button to upload your file.
Once you've picked your file, the tool will show you the compression options. This is where you put what you've learned about balancing size and quality into practice.
After you select your compression level, the tool does the heavy lifting. The process is usually over in a few seconds, and you’ll get a download link for your newly optimized PDF. Give our free online PDF compression tool a try to see the results for yourself.
Pro Tip: Always download and check your compressed file before you send it anywhere. Open it, zoom in, and make sure the text is still readable and the images look good enough for what you need. A quick two-second check can save you from the embarrassment of sending a blurry mess to someone important.
Using Desktop Software for Better Control
Online tools are brilliant for a quick fix, but what about sensitive files? Sending contracts or financial reports to a random server isn't always the best move. That's when desktop software becomes your best friend.
When you need serious control, better security, or just want to work offline, a native application gives you the power to manage the entire compression process on your own machine. Your files never leave your computer, giving you total peace of mind.
Harnessing Your Operating System's Built-in Tools
You might already have a solid PDF compressor without realizing it. Both macOS and Windows come with built-in features that can do a surprisingly good job of shrinking down bloated files.
For Mac users, the Preview app is a hidden gem. Just open your PDF, go to File > Export, and choose the "Reduce File Size" option from the Quartz Filter menu. It’s a one-click fix that works wonders on documents loaded with high-res images, making them email-ready in seconds.
If you're on Windows, you can pull a clever trick with the "Microsoft Print to PDF" feature. Open your PDF in any reader, hit Print, and select "Microsoft Print to PDF" as the printer. This essentially rebuilds the document from scratch, flattening complex layers and often creating a much smaller file in the process.
This decision tree helps you pick the right compression level based on what you need.
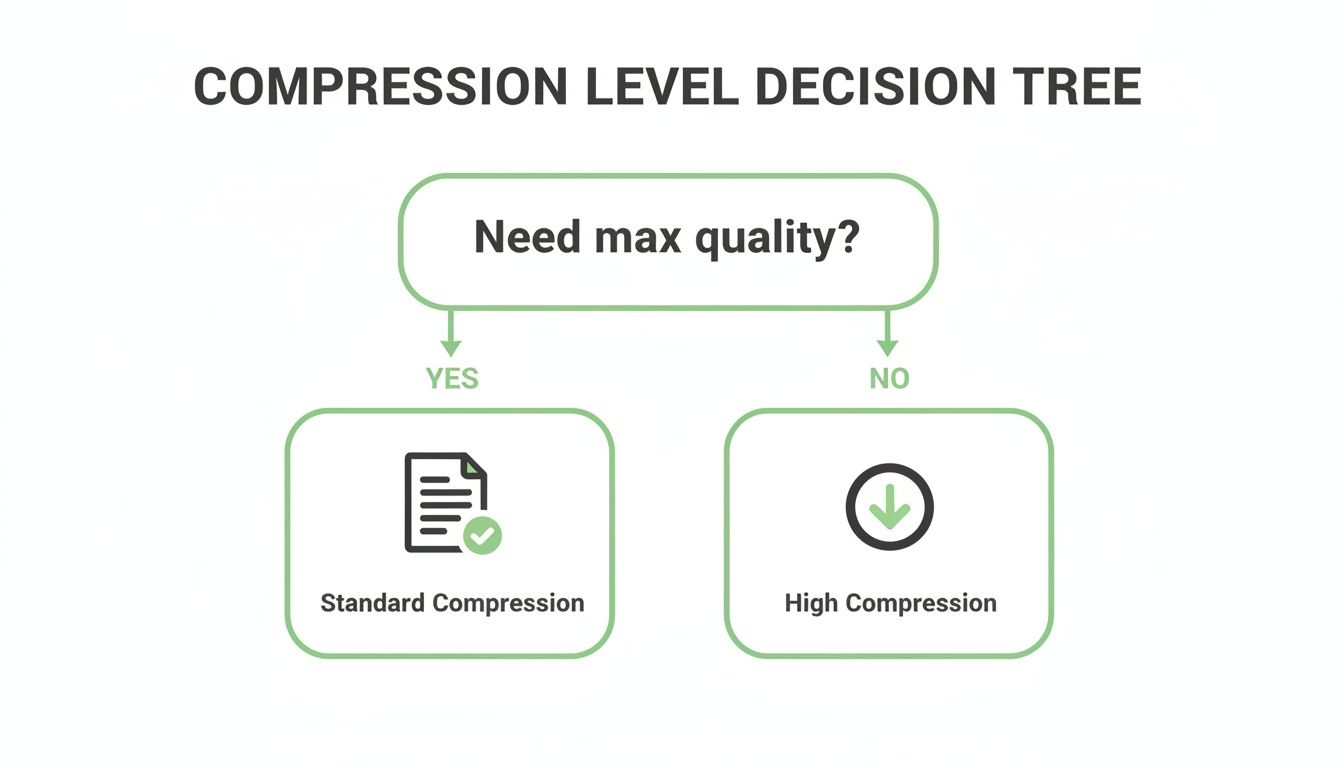
As you can see, standard compression is your go-to for keeping quality high, while high compression is all about getting the smallest possible file size.
Adobe Acrobat Pro for Granular Optimization
When you need the ultimate level of control, nothing beats Adobe Acrobat Pro. Its "PDF Optimizer" tool is the industry standard for a reason. It lets you go way beyond simple presets and get your hands dirty with the file's internal structure.
This is where you get to be a true PDF wizard:
- Image Downsampling: You can tell Acrobat exactly how to handle images. Set specific resolutions—say, 150 PPI for web viewing or 300 PPI for print—for color, grayscale, and monochrome images separately.
- Font Subsetting: Got a text-heavy report? This feature strips out unused characters from embedded fonts, which can shave off a surprising amount of data.
- Object Discarding: Get rid of the junk. You can remove hidden metadata, JavaScript, or flattened form fields that add "invisible" weight to your document.
This isn't just for power users. In fields like healthcare or finance, where compliance is key, this level of precision is non-negotiable. Specialized algorithms in Acrobat can shrink black-and-white image files by 70% and color PDFs by 50%. For a hospital system, that kind of efficiency could slash annual PDF storage costs from $500K to around $150K.
Once you get the hang of these desktop tools, you can create a perfectly balanced PDF every time. For an even deeper look at other techniques, check out our comprehensive guide to PDF compression. This control ensures your final document is not just small, but professional and perfectly suited for its purpose.
Advanced Tips for Quality Preservation
Simply choosing a compression preset is usually good enough, but what happens when even the "Standard" setting leaves your images blurry or makes the text look soft? To really master PDF compression, you need to think beyond the basics. It's about tackling the root causes of file bloat before you even hit the compress button.
This proactive approach is the secret to a final document that's both compact and professional.
Aggressive compression almost always goes after the images first, which is why they’re the number one source of quality loss. Instead of letting an algorithm make a blind guess, you can take control by optimizing your images in their original application—like Photoshop or Canva—before you even add them to your PDF.
Optimize Images Before Exporting
The single most effective trick to preserve quality is to manage the image resolution yourself. Resolution is measured in Pixels Per Inch (PPI), and if you match it to how the document will be used, you can prevent a ton of unnecessary data bloat from the start.
- For web and screen viewing: A resolution of 72-150 PPI is perfect. Anything higher just adds file size with no visible benefit on a monitor.
- For professional printing: You’ll want to stick to 300 PPI to make sure everything comes out crisp and clear on paper.
By resizing your images to the right PPI before they go into your InDesign layout or Word document, you're stripping out excess data from the get-go. This gives the compression tool much less work to do, leading to a smaller file with barely any drop in quality. And if you ever need to check the images in an existing PDF, our guide on converting a PDF back into an image can be a real lifesaver.
Clean Up Your Source Document
But images aren't the only culprits. Hidden data and complex elements buried in your source file can add serious weight. Before you export to PDF, it’s worth doing a quick audit of your original document.
Key Takeaway: Little things like hidden layers in a design file, bloated metadata, or entire font families can make a PDF huge. Cleaning these up in the original document is a much smarter way to compress.
Fonts, for example, can sometimes eat up over 50% of a PDF's total file size. When you export, make sure font subsetting is turned on. This feature only embeds the specific characters you actually used in your document, not the entire font family. That simple check can save you several megabytes.
Finally, think about flattening your PDF. If your document has a lot going on—transparent layers, complex vector graphics, or annotations—flattening merges them all into a single, simple layer. This not only makes the file much easier for a compression tool to handle efficiently but often results in a smaller, more stable PDF.
What to Do When PDF Compression Goes Wrong
Sometimes, you hit "compress," and the result just isn't what you were hoping for. Maybe the file size barely changed, or worse, your once-crisp document now looks like a blurry mess. Don't worry. Most of these problems are easy to fix once you know what's causing them.
Why Didn’t My PDF Get Any Smaller?
You ran your file through a compressor, but the size is practically the same. What gives? This almost always comes down to one of two things.
The most common reason is that your document is mostly text. Plain text is already incredibly small and efficient, so compression algorithms just don't have much data to squeeze out.
The other possibility? Your images were already optimized. If the photos or graphics in your PDF were saved for the web or compressed before, there's no extra fat to trim. Compressing an already-compressed file won't do much.
My PDF Quality Is Awful. Now What?
So you managed to shrink the file, but now your images look pixelated and your text is fuzzy. That’s a classic case of over-compression. When you choose an aggressive, high-compression setting, the tool prioritizes a tiny file size over everything else—and visual quality is the first thing to go.
The fix is simple: just re-compress the original file with a gentler setting.
- Try Standard Compression: This setting is your best friend. It strikes the perfect balance between a smaller file and sharp, readable quality for almost any use case.
- Use Desktop Software for Finer Control: Tools like Adobe Acrobat let you get granular. You can set a minimum image resolution—150 PPI is a good baseline for screens—to prevent your images from turning into a pixelated soup.
The Goal Isn't Just a Smaller File It's the smallest usable file. Always give your compressed PDF a quick visual check before you send it off. A tiny file is useless if no one can read it.
My Links and Form Fields Broke!
Ever compressed a PDF only to discover your clickable links are dead and your fillable form fields are just static boxes? This happens when a compression tool "flattens" the PDF. It basically merges all the interactive layers into one flat image to save space, destroying any functionality in the process.
If you need to keep those interactive elements alive, stay away from any tool or setting that mentions flattening. Pro-level tools like Adobe Acrobat are much better at recognizing and protecting these features during optimization.
When in doubt, always run a test on a copy of your file first. A quick 30-second check can save you from a major headache later.
Common Questions About PDF Compression
Even with the best tools, you might hit a snag when compressing a PDF. It's usually a straightforward process, but sometimes the results can be a little unexpected. Here are some quick answers to the most common questions we see, helping you get the perfect result every time.
These insights will help you troubleshoot common issues and make smarter decisions about your workflow.
Why Didn't My PDF Get Any Smaller?
It’s definitely frustrating to run a file through a compressor only to see the size barely budge. If this happens to you, your document was probably already optimized.
This is super common with PDFs that are mostly text. Plain text data is incredibly efficient and doesn't have much "fat" for a compression tool to trim. The same goes for documents where the images were already compressed before being added—like web-optimized JPEGs. The algorithm simply has nothing left to remove without damaging the content.
Key Takeaway: Compression works by removing redundant data. If a PDF is already lean—especially if it's all text or contains pre-compressed images—you won't see a big drop in file size.
Will Compressing a PDF Ruin the Quality?
Yes, it can, but how much really depends on the settings you choose. It's the classic trade-off: file size versus visual quality.
It helps to understand the two main types of compression:
- Lossy Compression: This method aggressively shrinks files by permanently deleting "unnecessary" data. It’s fantastic for getting the smallest possible size, but this is where you’ll see a drop in image quality. Most "High Compression" settings use this approach.
- Lossless Compression: This clever method reorganizes the file’s data more efficiently without tossing any of it out. It perfectly preserves quality, but the size reduction is much less dramatic.
Most tools, including PDFPenguin, aim for a smart balance. But if you’re working with something important like a professional portfolio or a final report, always open the compressed file and check the quality before you send it off.
Are Online PDF Compressors Safe to Use?
For most everyday documents, reputable online compressors are perfectly safe. Leading services use HTTPS encryption to protect your files during upload and download, so your data is secure while it's in transit. They also have privacy policies stating that your files are automatically deleted from their servers after a short period, often just a few hours.
However, if you're handling highly sensitive or confidential information—think legal contracts, financial records, or private medical documents—the most secure option is always offline desktop software. Using tools like Adobe Acrobat or Preview on a Mac means your file never leaves your computer. This completely eliminates any risk of it being accessed on a third-party server, giving you absolute control and privacy over your most important documents.
Ready to shrink your PDFs the easy way? PDFPenguin offers fast, secure, and high-quality compression right in your browser. Get started for free and shrink your files in seconds.