We’ve all been there. You try to email a big design portfolio or a lengthy report, and a minute later, it bounces back: file too large. It’s a common frustration, but the fix isn’t magic. The key to shrinking a PDF without it looking terrible is all about smart reduction. We're aiming for "perceptual quality"—making files smaller in ways the human eye won't even notice.
Shrinking Your PDFs While Keeping Them Sharp
This isn’t just a personal annoyance; oversized PDFs are a massive headache for businesses. The demand for good compression tools is exploding, with the PDF SDK market jumping from USD 0.23 billion in 2024 to a projected USD 0.48 billion by 2033.
Why the surge? Because professionals need to get work done, and bloated files get in the way. In fact, 70% of office workers say email attachments are their biggest PDF pain point.
Why Smart Compression Matters
Just zipping a file is a temporary fix. True optimization rebuilds the PDF's internal structure, permanently cutting down its size. This guide will show you how to take control of that process so your documents stay crisp and professional, every time.
Here's what you'll be able to do:
- Drastically shrink file sizes so you can share them anywhere.
- Keep images and text looking sharp.
- Pick the right compression settings for any situation.
- Get it all done in seconds with a simple browser tool like PDFPenguin.
This is especially important if you're using modern cloud-based document management systems, where smaller, optimized files are way easier to store, sync, and share.
The goal is not just to make a PDF smaller, but to make it smarter. By optimizing unnecessary data without touching the core content, you can achieve significant size reductions with virtually zero perceptible loss in quality.
Overcoming Common Hurdles
A lot of people think "compression" automatically means blurry images and fuzzy text. That’s a total misconception. When you understand what a PDF is actually made of—images, fonts, and hidden data—you can control exactly how it gets smaller.
This guide will demystify the whole thing, turning what feels like a technical chore into a simple, go-to skill. Whether you're a student submitting an assignment, a freelancer sending a client proposal, or an administrator sharing company-wide reports, knowing how to properly compress a PDF is essential. If you want to dive deeper, you might be interested in our guide on navigating https://pdfpenguin.net/blog/email-attachment-size-limits.
What Really Happens When You Compress a PDF
Ever wonder what’s going on under the hood when you shrink a PDF? It’s not just random squeezing. A smart compression tool performs a targeted audit of your file, figuring out where all the "weight" is and how to reduce it without you noticing.
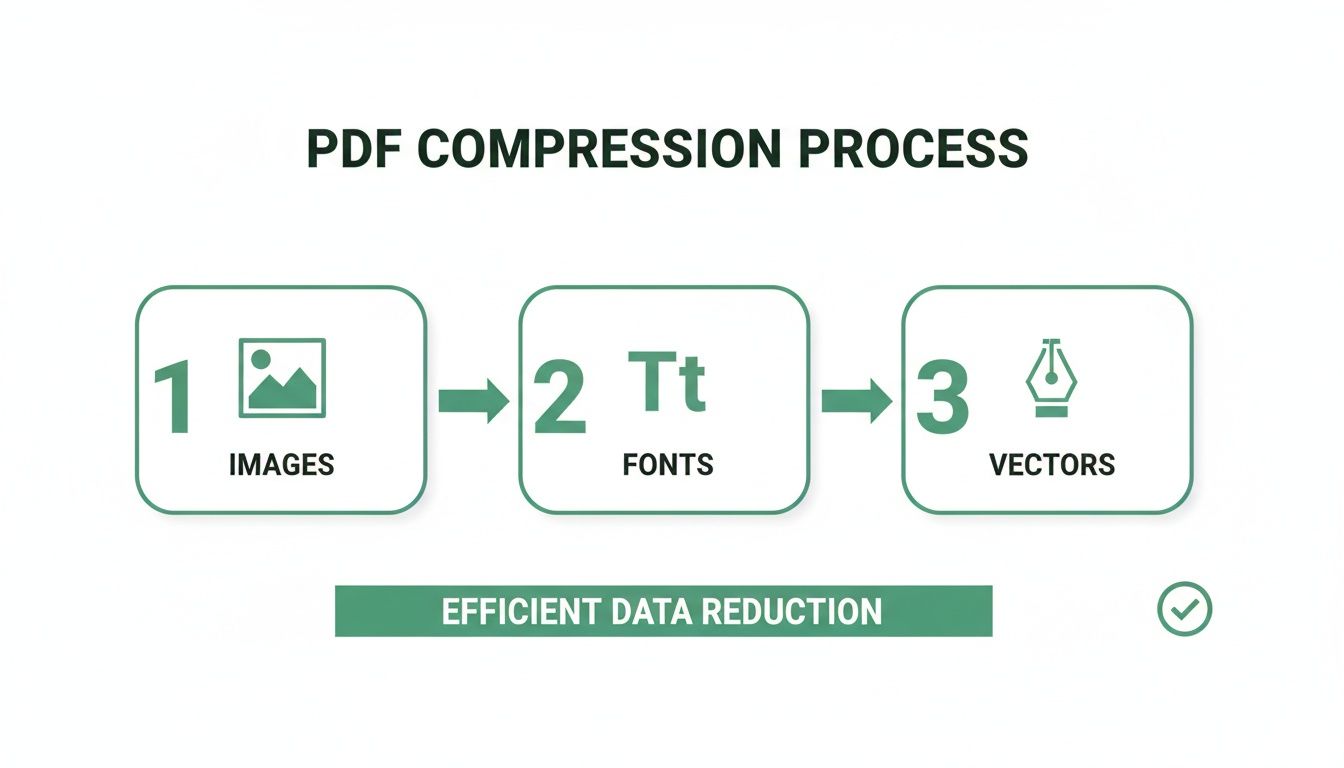
Think of your PDF as a container holding text, images, fonts, and other data. The key to compressing a PDF without losing quality is to strategically optimize the heaviest items—usually the images—while leaving the important stuff alone.
Unpacking the Role of Images
Images are almost always the biggest culprits behind a bloated PDF. A single high-res photo can easily take up more space than a hundred pages of text. Here’s how a good compressor tackles them.
First, it uses a technique called downsampling. Imagine you have a photo shot with a professional camera—it contains a massive amount of detail meant for a giant print. But if that photo is just going to be viewed on a laptop screen, you don't need all that extra data. Downsampling intelligently lowers the resolution (measured in DPI, or Dots Per Inch) to fit its intended use—like 72-150 DPI for web or email—without any visible quality loss.
Next, the tool chooses the right compression algorithm for the job:
- JPEG Compression: Perfect for photographs. This is a "lossy" method, which sounds bad but isn't. It cleverly removes bits of data your eyes wouldn't have noticed anyway, giving you a huge reduction in file size.
- ZIP/Flate Compression: This is "lossless," making it ideal for logos, charts, and graphics with solid colors. It finds repetitive patterns and stores them more efficiently without deleting a single pixel.
Managing Fonts and Text
Text itself is tiny, but the fonts used to display it can add a surprising amount of bulk. To make sure your PDF looks the same on every device, fonts are often embedded directly into the file.
The problem? Embedding a full font family can add megabytes. A smart compressor fixes this by creating a font subset. Instead of including the entire character library, it only packs the letters, numbers, and symbols you actually used. This simple trick keeps your text looking perfect while cutting out all the unnecessary weight.
It's this kind of intelligent optimization that's driving the PDF editor market, which is expected to grow from USD 3.36 billion in 2023 to USD 15.11 billion by 2032. As more businesses go digital, shrinking huge files for sharing is no longer a "nice-to-have." In fact, 55% of administrative staff say oversized files are a major roadblock. With the right tool, a 50-page report can go from a clumsy 22MB to a sleek 1.5MB without sacrificing sharpness.
Optimizing Vector Objects and Redundant Data
Unlike pixel-based photos, vector graphics (like logos or diagrams) are built from mathematical paths. While they’re usually small, complex designs can still weigh a file down. Compression tools work to simplify these paths and remove redundant anchor points without altering the shape you see on the page.
A great PDF compressor acts like a skilled editor. It doesn't just cut content; it meticulously trims redundant metadata, flattens unnecessary layers, and optimizes every element to be as efficient as possible without compromising the core message.
Finally, every PDF carries some digital baggage—hidden metadata and unused objects left over from the creation process. A good cleanup pass purges all this junk data that serves no purpose. It’s like tidying up a room: it looks the same, but it feels a whole lot lighter.
Putting It All Into Practice with an Online Tool
Theory is great, but let's be honest—seeing it work is what really matters. I'm going to walk you through the process using a simple, browser-based tool like PDFPenguin to compress a PDF without losing quality. The best part? No software to install. You can do this from anywhere.
The whole point of a good online tool is to make this stuff easy, even if you’re not a tech guru. You just hand over your document, and the tool does all the heavy lifting.
First Up: Uploading Your File
To get started, you need to get your PDF into the system. Most online tools keep this part dead simple.
As you can see, it’s usually a drag-and-drop affair. You can pull the file right onto the webpage or click a button to find it on your computer. This gives you instant confirmation that your document is ready for the most important part: picking your compression level.
Choosing the Right Compression Preset
This is where you make the key decision. Once your file is uploaded, you'll be presented with a few options that trade file size for visual quality. A tool like PDFPenguin typically gives you a couple of presets built for common scenarios.
- Basic Compression (Recommended): Think of this as your everyday workhorse. It delivers a huge reduction in file size but is carefully tuned to keep images and text looking sharp. It’s perfect for just about anything where readability is key—client proposals, internal reports, you name it.
- Strong Compression (Maximum Size Reduction): This is the "get as small as possible" option. It's more aggressive with its optimizations, making it the right choice when size is the only thing that matters. Think of it for things like low-res web previews or squeezing a massive file under a tiny email attachment limit.
Here’s the simple way to think about it: Basic Compression is for preserving detail, while Strong Compression is for maximum portability.
The right preset always comes down to where your document is headed. Is a client reviewing it for pixel-perfect detail, or are you just trying to get it online for a quick download? Your answer points you to the perfect balance.
The Moment of Truth: Before and After
So, does it actually work? Can you get a much smaller file without a noticeable hit to quality? Let’s look at a real-world example.
Say you have a 15-page marketing brochure. It’s packed with high-resolution photos and a bunch of custom fonts.
- Original File Size: 18.4 MB
That’s way too big to email reliably, and it would be a slog for anyone to download from your website.
After uploading it and choosing the "Basic Compression" setting, the change is dramatic.
- Compressed File Size: 3.1 MB
That's an 83% reduction in file size. Suddenly, the document is small enough for any email client, loads in a flash online, and is a breeze to store.
But what about the quality?
When you put the original and compressed versions side-by-side, you’d be hard-pressed to spot the difference. The text is still perfectly crisp, the colors pop, and the images look just as sharp. The tool successfully trimmed all the fat without touching the visual muscle.
This works because the algorithm did exactly what we talked about earlier—it intelligently downsampled images to a screen-friendly resolution and created font subsets. It didn’t just mindlessly shrink everything; it performed targeted surgery. That's the real secret to how you compress a PDF without losing quality. You're not making it worse, you're just making it lighter.
Choosing the Right Settings for Your Profession
Generic compression presets are great for quick, everyday tasks. But when your job depends on the quality and integrity of a document, a one-size-fits-all approach just won’t do.
To truly compress a PDF without losing quality, you have to think about who it's for and what it's for. A marketer sending a brand brochure has completely different needs than a lawyer submitting a legal contract. Getting the settings right is what separates a professional, optimized file from a sloppy, amateur one.
For Legal and Financial Teams
In the legal and financial worlds, integrity is everything. The goal isn't just to make a file smaller; it's to create a smaller file that remains a perfect, verifiable record of the original. Over-compressing a contract could smudge the fine print or, even worse, wreck the hidden text layer from Optical Character Recognition (OCR), making the document completely unsearchable.
Here’s what you need to prioritize:
- Preserve OCR Data: Your settings must protect the text layer. A contract you can't search is a massive liability.
- Keep Text Sharp: Always use lossless compression for text and line art. The legibility of every clause and number has to be perfect.
- Go Easy on Image Compression: For scanned evidence or signatures, avoid aggressive JPEG compression. The last thing you want are artifacts that call the document's authenticity into question.
The huge growth in data compression software is directly tied to these professional needs. Finance teams in Europe, for example, often handle compliance documents that can run into gigabytes. Smart compression can shrink them by 75-85% while keeping them ready for an audit. A 2024 survey also found that 62% of small businesses waste hours on oversized PDFs, but tools that deliver an 80% size reduction without visible quality loss can boost efficiency by 40%. You can read more about the data compression market on Research and Markets.
For Marketers and Designers
Marketers and designers live and die by visual quality. Whether you're creating a downloadable e-book, a client presentation, or a print-ready ad, how your images and colors look is non-negotiable. The trick is balancing stunning visuals with a file size that won't make your audience give up and close the tab.
Think about these key settings:
- Color Profiles Are Critical: For web PDFs, sRGB is the standard. But for anything going to a printer, you absolutely must preserve the CMYK color profile to avoid nasty surprises when the colors look completely different on paper.
- Set the Right Resolution: A good rule of thumb is 150 DPI for high-quality web viewing and 300 DPI for print. Anything higher for the web is just adding dead weight to your file.
- Choose Image Compression Wisely: Use JPEG for photos to get great size reduction, but don’t push it so far you see blocky artifacts. For logos and graphics with sharp lines, stick with ZIP or other lossless methods.
It also helps to understand how other platforms handle images. For instance, learning about optimal export settings to beat image compression on social media can give you great insight into keeping images sharp—a principle that applies directly to your PDFs.
For professionals, compressing a PDF isn't just about making it smaller—it's about making it fit for purpose. A perfectly compressed file is one that meets its audience's expectations, whether that's a judge scrutinizing evidence or a customer admiring a product catalog.
For Students and Academics
For students, it’s all about beating the deadline and staying under the university portal’s file size limit. Quality matters, of course, but getting the assignment submitted on time is the real win.
Here’s a simple checklist for academic work:
- Prioritize File Size: Start with a preset that aims for a small file, like "Basic Compression."
- Check Readability: As soon as it's done, open the new file. Zoom in. Are all your text, charts, and diagrams perfectly clear? If not, dial back the compression a bit and try again.
- Optimize Images First: If your report is full of big images, like photos from a lab experiment, you can shrink the final PDF by optimizing them before adding them. Our guide on how to convert images to PDF for free can streamline this step.
- Don't Flatten Forms: Submitting a fillable form? Double-check that your compression settings don’t flatten it, which would make the interactive fields unusable.
Compression Settings for Different Industries
Choosing the right settings can feel complex, but it really comes down to your industry's top priority. This table breaks down the typical needs and recommended starting points for various professional fields.
| Industry and Use Case | Main Priority | Recommended DPI | Image Compression | Potential Pitfalls |
|---|---|---|---|---|
| Legal (Contracts, Filings) | Text Integrity & Searchability | 300 DPI | Lossless (ZIP) for text/scans | Destroying OCR layers; signature artifacts |
| Marketing (Brochures, Ads) | Visual Quality & Color Accuracy | 150 (Web), 300 (Print) | JPEG (Medium-High) | Poor color matching (RGB vs. CMYK); pixelation |
| Architecture/Engineering (Blueprints) | Line Sharpness & Detail | 400+ DPI | Lossless (ZIP/CCITT) | Smudged lines; loss of fine measurements |
| Healthcare (Medical Records) | Legibility & Confidentiality | 300 DPI | Lossless (ZIP) | Illegible text; HIPAA compliance issues |
| Education (Assignments, Research) | Small File Size & Readability | 72-150 DPI | JPEG (Medium) | Unreadable charts; portal upload rejection |
| Photography (Portfolios) | Maximum Image Fidelity | 300 DPI | JPEG (Max Quality) | Visible compression artifacts; muted colors |
Ultimately, by matching your compression strategy to your professional needs, you’re no longer just shrinking files. You’re intelligently engineering them for success.
How to Fix Common PDF Compression Issues
Even with the best tools, you might occasionally compress a PDF and find it doesn't look quite right. Don't worry—most of these issues are easy to fix once you know what to look for.
The goal is always to compress a PDF without losing quality, but sometimes the settings can be a little too aggressive for a specific document. A few simple tweaks are usually all it takes to get that perfect balance between a small file size and a sharp, professional-looking document.
Dealing with Pixelated or Blocky Images
This is the most common issue we see: images that look fuzzy, blurry, or have weird blocky squares on them after compression. This is a classic sign of JPEG compression being turned up too high.
When you compress an image-heavy PDF, the algorithm has to decide which visual data to throw away. If the setting is too aggressive, it starts discarding details that your eyes can see, leading to that pixelated look.
- The Quick Fix: Just re-compress the original file with a lighter touch. If you used a "Strong" or "Maximum" preset before, dial it back to a "Basic" or "Recommended" option. This tells the tool to prioritize how good the images look over squeezing out every last kilobyte.
Why Your Text Became Fuzzy or Unsearchable
Did the text in your PDF go from crisp and clear to slightly blurry? Or worse, can you no longer search for words in the document? This usually points to one of two things.
First, some tools mistakenly flatten text, turning it into a static image instead of a selectable vector. More often, especially with scanned files, the compression process strips away the invisible Optical Character Recognition (OCR) layer that makes the text searchable.
A good compression tool should never mess with your text. If your document becomes unsearchable, it's a huge red flag that the tool isn't handling OCR data correctly, which is a deal-breaker for legal or archival documents.
To fix this, make sure your compression tool is smart enough to preserve OCR layers. For scanned documents, it also helps to start with a high-quality scan in the first place. If you want to dive deeper, our guide on how to convert scanned documents to PDF has a ton of useful tips.
Fixing Unexpected Color Shifts
Ever compressed a vibrant marketing brochure only to find the colors look dull and washed out? That’s almost always a color profile problem. It happens when a tool incorrectly converts a document from one color space (like CMYK for print) to another (like sRGB for web).
The best way to avoid this is to use a tool with advanced settings that let you preserve the original color profile. If you're using a simpler online tool, just make sure your PDF is already in the right color space (sRGB for anything viewed on a screen) before you upload it for compression.
Protecting Your Privacy and Security
Finally, let's talk about something crucial: security. When you upload a document to an online service, you're trusting that platform with your data. The most reliable tools are transparent about how they protect you.
Here’s what to look for:
- HTTPS Encryption: This ensures your file is scrambled and secure while it's traveling to and from their servers.
- Automatic File Deletion: The service should permanently delete your files automatically after a short time. Your data shouldn't live on their servers forever.
Using a secure, browser-based tool like PDFPenguin means you can compress sensitive files with confidence, knowing your data is handled responsibly.
Got Questions About PDF Compression? We've Got Answers.
Diving into PDF compression can feel a bit technical, but it doesn't have to be. We get a lot of questions about how it all works, from quality concerns to security. Here are some quick, straightforward answers to the most common ones.
Our goal is to demystify the process so you can feel confident every time you need to compress a PDF without losing quality.
Does Compressing a PDF Always Ruin the Quality?
Not at all—and this is the biggest myth we need to bust. The magic is in understanding the difference between lossless and lossy compression.
-
Lossless Compression: Think of this as smart packing. It finds repetitive data in your file and reorganizes it more efficiently without deleting a single pixel. It’s perfect for text-heavy documents, legal forms, or anything where every tiny detail matters.
-
Lossy Compression: This is a more clever approach, usually for images. It selectively removes tiny bits of data that your eyes would never notice anyway. A little bit of lossy compression can slash file sizes with zero perceptible drop in quality.
Trouble only starts when lossy compression gets too aggressive. A good tool lets you control this, so you can find that sweet spot between a smaller file and a sharp-looking document.
"Quality loss" is often a misleading term. For most files, smart compression just gets rid of invisible, bloated data. The user experience doesn't change—the file just becomes way more efficient.
Is It Safe to Compress Sensitive Files Online?
This is a great question, and one you should always ask. When you're uploading a financial report, a resume, or a confidential contract, you need to know it's in safe hands.
Here’s the non-negotiable checklist for any online tool you use:
- HTTPS Encryption: Look for the little padlock and "https://" in the URL. This scrambles the data between your computer and the server so no one can intercept it.
- A Clear Privacy Policy: The service should tell you exactly what it does (and doesn't do) with your files. No vague language.
- Automatic File Deletion: Trustworthy tools don't hang onto your data. They should automatically and permanently delete your files from their servers after a short window, usually just a few hours.
If a tool checks all these boxes, you can compress sensitive documents without a second thought.
Why Not Just Zip It?
Zipping a file and compressing a PDF are two totally different things. A Zip file is just a container. It bundles your PDF up, maybe shrinking it a tiny bit, but the PDF inside is still just as big as it was before. The person on the other end has to unzip it first—an extra, annoying step.
True PDF compression actually rebuilds the file from the inside out. It optimizes the images, fonts, and other data to create a permanently smaller file that’s ready to use instantly.
Think of it this way: zipping is temporary bundling, while compression is permanent optimization.
Ready to shrink your PDFs the right way? With PDFPenguin, you can get smaller files in seconds while keeping everything looking sharp and professional. Our tools are fast, secure, and run right in your browser. Give it a try and see the difference for yourself at https://www.pdfpenguin.net.